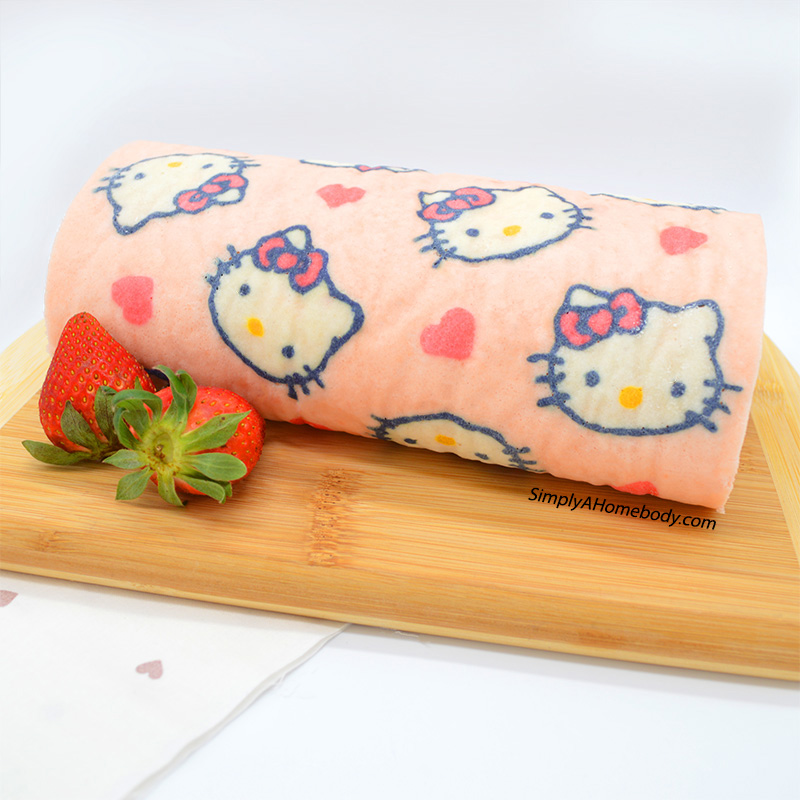
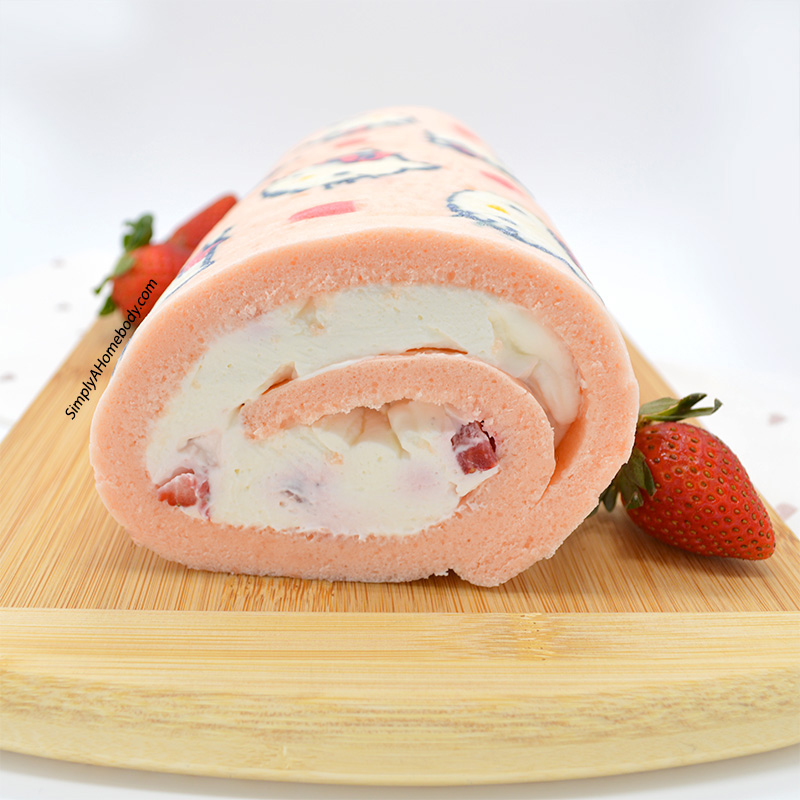
This Hello Kitty cake roll is not only pretty to look at but also tastes great! The soft cake is filled with whipped cream and tangy strawberry chunks.
I’ve been eyeing many patterned cake rolls on Instagram, and I finally got to make it myself! I adopted Love & Olive Oil’s recipe to create my Hello Kitty cake roll, and this cake is perfect for special occasions like birthdays.
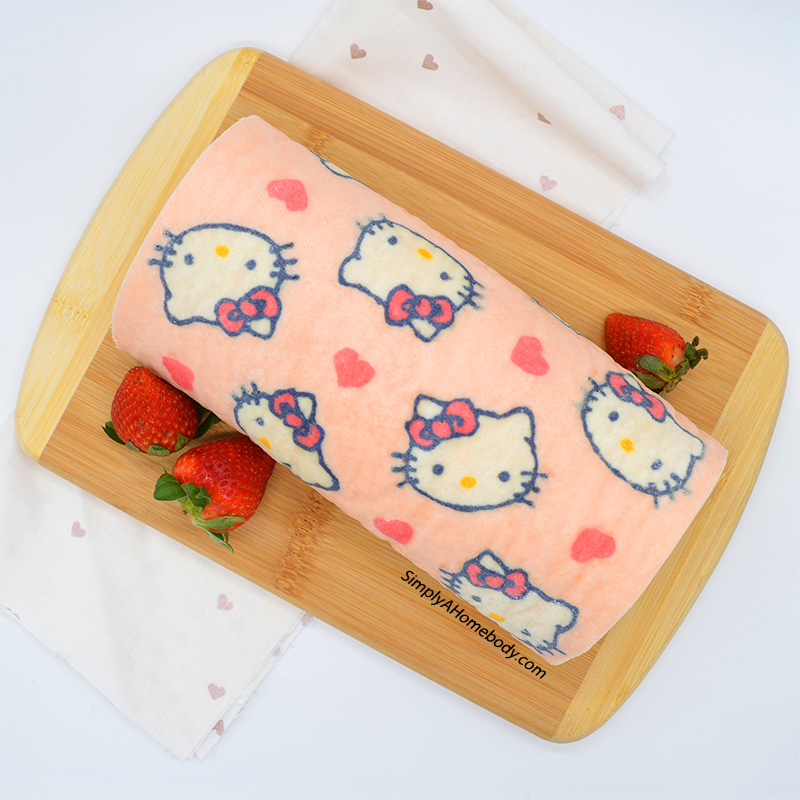
To be honest, I couldn’t achieve a satisfying result on my first try. In this post, I will show you all the steps in detail and mention all the mistakes I’ve made in the beginning so you can achieve a great result much easier than I did 🙂 Don’t worry, it is fairly simple to make once getting the hang of all the processes.
Special items you need to make Hello Kitty cake roll
Jelly Roll Pan Vs Cookie Sheet
For my first try, I used a rimmed cookie sheet instead of a jelly roll pan. It didn’t work out so well… A standard jelly roll pan is 10”x15”. The cookie sheet I used was 12”x16”, and it was too big for the amount of cake batter I made. The batter spread too thin and the cake turned out flat.
If you are planning to make a BIG cake roll, a rimmed cookie sheet may work by adjusting the quantities in the recipe, but if you are planning to follow my recipe, a jelly roll pan is recommended.
Drawing Pattens
On this Hello Kitty cake roll, you will draw designs with some cake paste. When you are making the paste, it is very important to make sure there are no lumps. When the paste is not completely smooth, piping tips will be clogged and make it difficult to draw designs on parchment paper.
If you see any lumps larger than 1mm, I recommend strain them with a fine strainer before packing them into the piping bags.
Drawing patterns on parchment paper is really fun. If you ever tried decorating cookies with royal icing, the process should feel somewhat similar. The paste doesn’t harden as quickly as royal icings, so making mistakes is more forgiving. If you made any mistakes on the patterns, just scrape the bad part off with a tip of a toothpick and keep going!
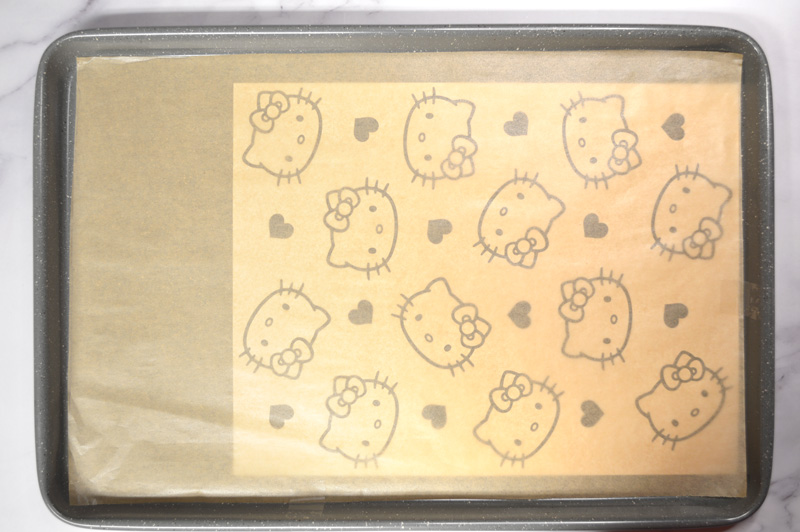
You can use any designs you like, but my Hello Kitty cake template can be downloaded from the button below. Print it out on letter-size paper and you are good to go.
Ingredient List
For paste:
- 2 tablespoons (30g) unsalted butter, softened (softer than room temp, but not melted)
- 2 1/2 tablespoons (30g) granulated sugar
- 1/3 cup (40g) cake flour, sifted
- 1 large egg white
- Black food coloring
- Red food coloring
- Yellow food coloring
For cake:
- 3 large eggs, separated
- 1/4 cup granulated sugar, for egg yolk
- 2 tablespoons granulated sugar, for egg white
- 1 tablespoon vegetable oil
- 1 1/2 tablespoons (23g) whole milk
- 1/2 teaspoon vanilla extract
- 1/2 teaspoon kosher salt
- 2/3 cup (67g) cake flour, sifted
- Pink food coloring
- Red food coloring
For filling:
- 1 cup heavy whipping cream
- 4 oz Cream Cheese
- 1 cup Powdered Sugar
- 1 teaspoon vanilla extract
- 7-10 strawberries medium, chopped
Cake flour VS All-Purpose Flour
When I made this roll cake for the first time, I used all-purpose flour because I didn’t have cake flour at hand. Bad idea… I later found out that all-purpose flour has a higher protein content and produces more gluten, which caused my cake to harden.
To bake a soft and fluffy cake, cake flour is a must. For this roll cake, you’ll only need 1 cup of cake flour total. If you don’t want to purchase cake flour, you can also make your own like this.
Instructions for Hello Kitty Cake Roll
For paste:
- Lightly butter or grease the bottom and sides of a 15 by 10-inch jelly roll pan. Place any templates you like and put parchment paper over it, or you can line parchment paper with your design traced onto the backside with thick pencil lines.
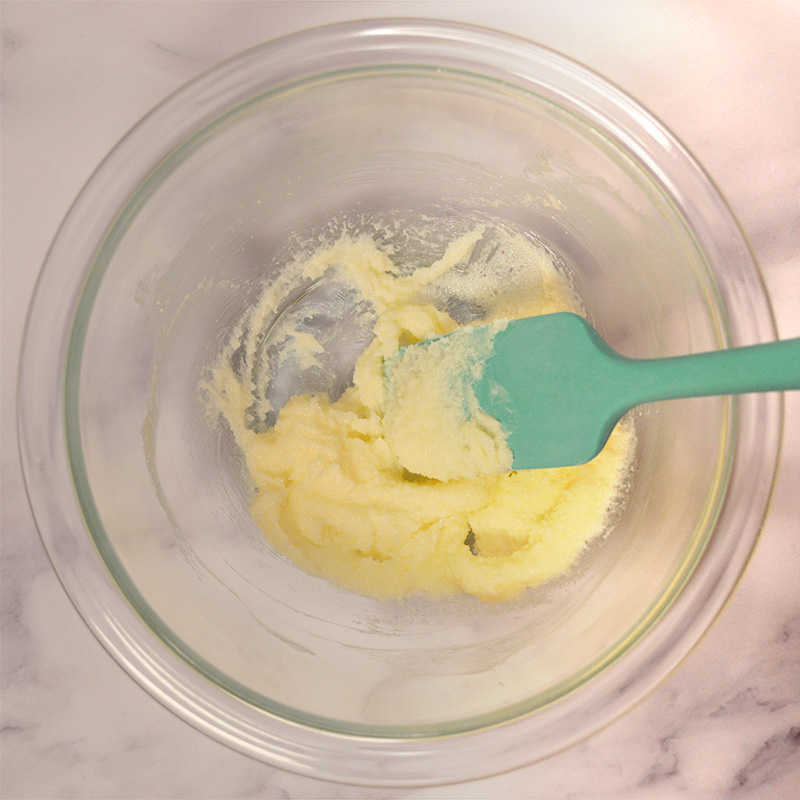
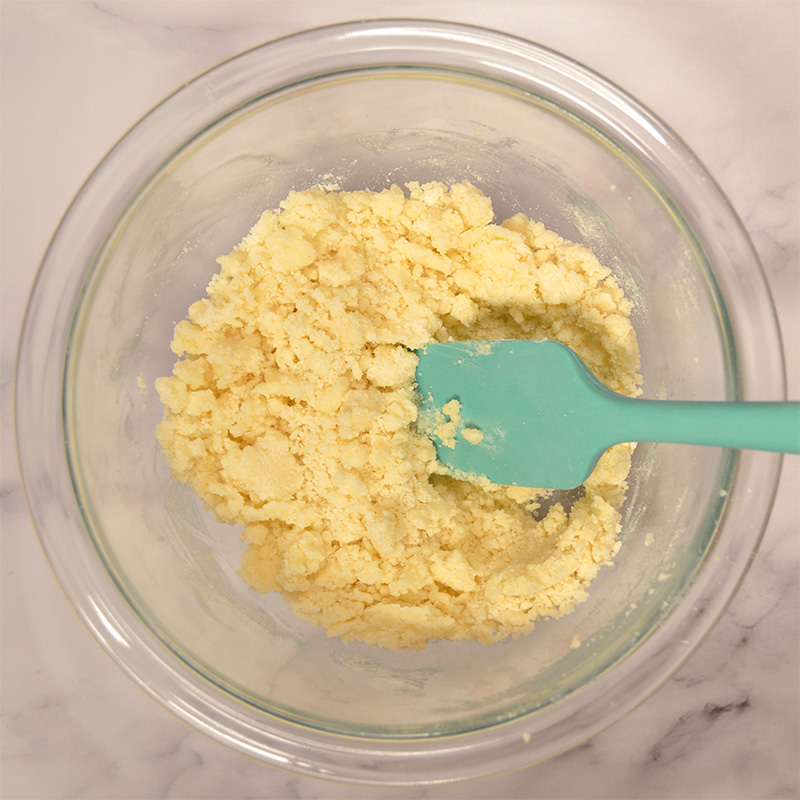
2. To make a paste, with a spatula or wooden spoon, mix softened butter and sugar together until you get a smooth paste.
3. Add flour and mix until partially incorporated, then add egg white and mix until smooth. Paste should have a buttercream-like consistency.
POINT: Make sure there are no lumps larger than 1mm. If there are, straining the paste is recommended.
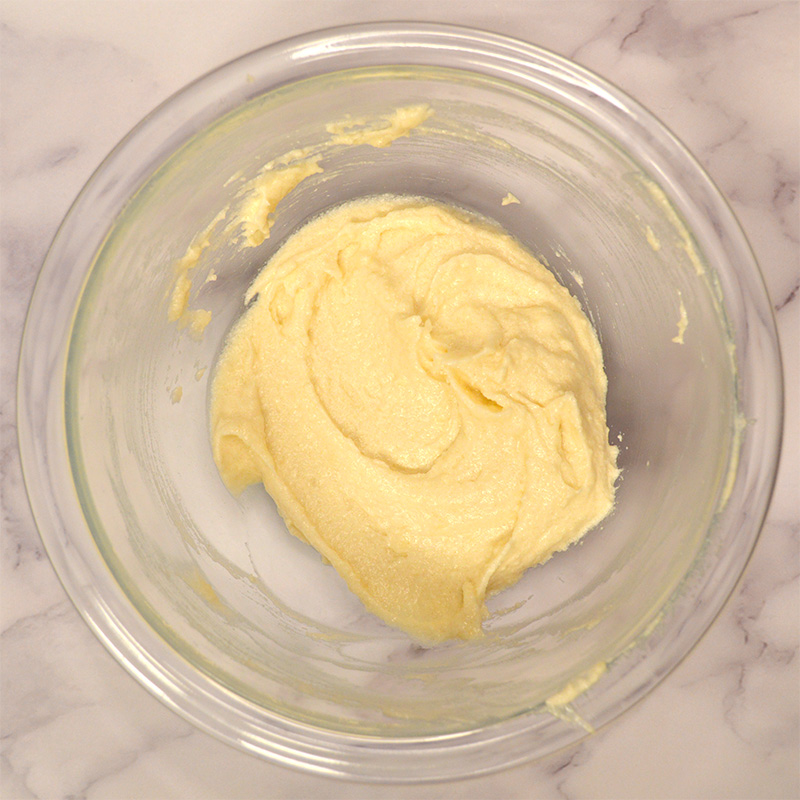
4. Leave about 1 teaspoon of paste in the large bowl and divide the rest of the paste into 3 small portions (I divided it almost evenly into 3 but slightly more for one of the cups). Leave the largest portion as is and add food colorings to the rest of the 2 – one with red coloring, the other with black food coloring. Mix yellow food coloring to the teaspoon of paste in the large bowl.
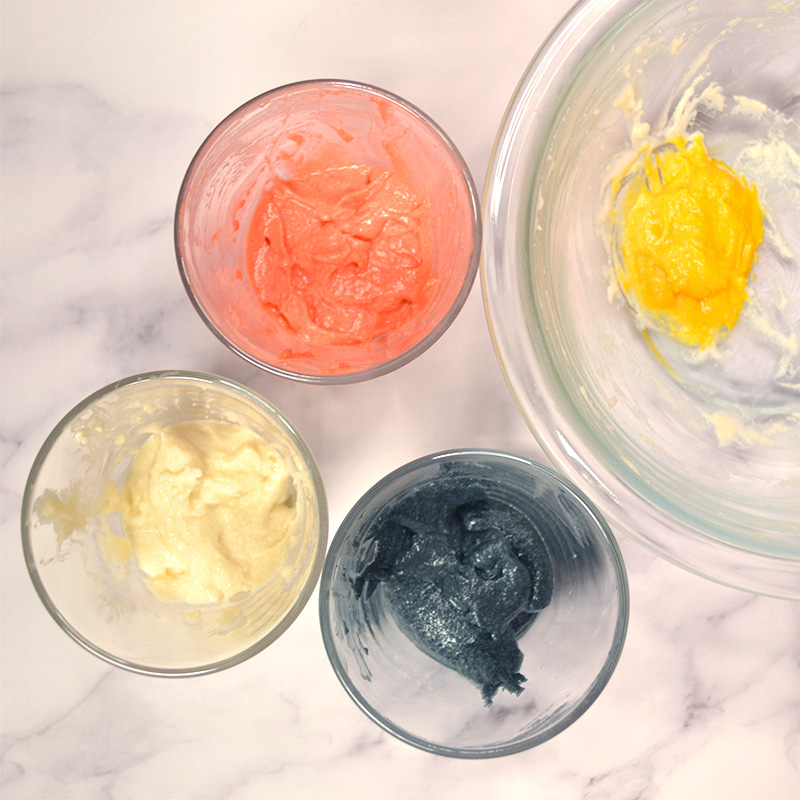
5. Transfer the black paste into a piping bag, fitted with a small round piping tip (1mm in diameter). Transfer the red and the plain paste into separate piping bags. For red and plain paste, piping tips are optional. Just snip the tips off about 3mm.
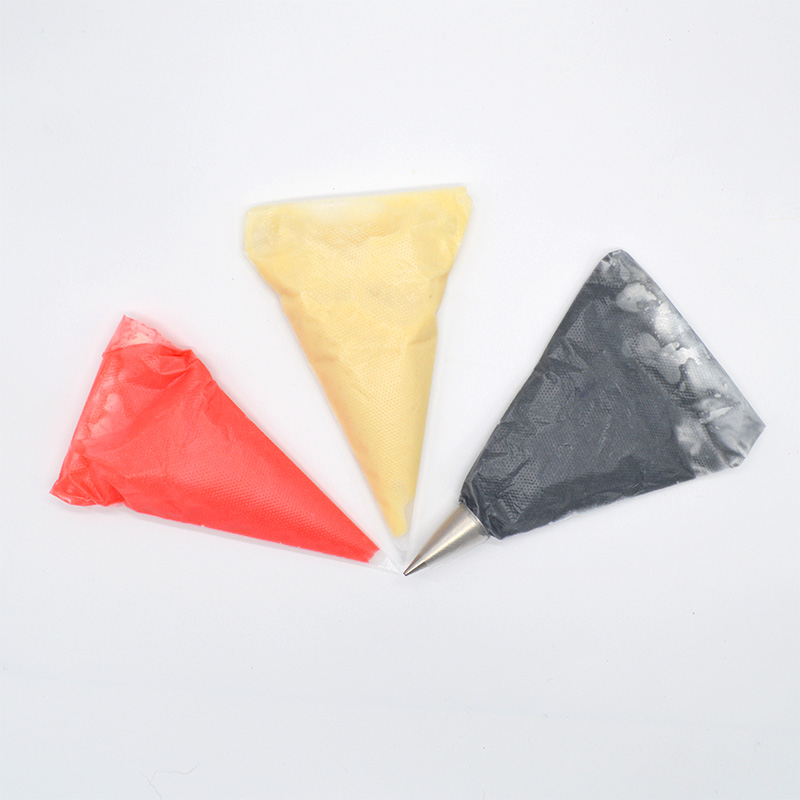
6. Pipe design onto parchment paper. Start with the black to outline Hello Kitty’s faces then place the yellow paste on Hello Kitty’s nose with a toothpick.
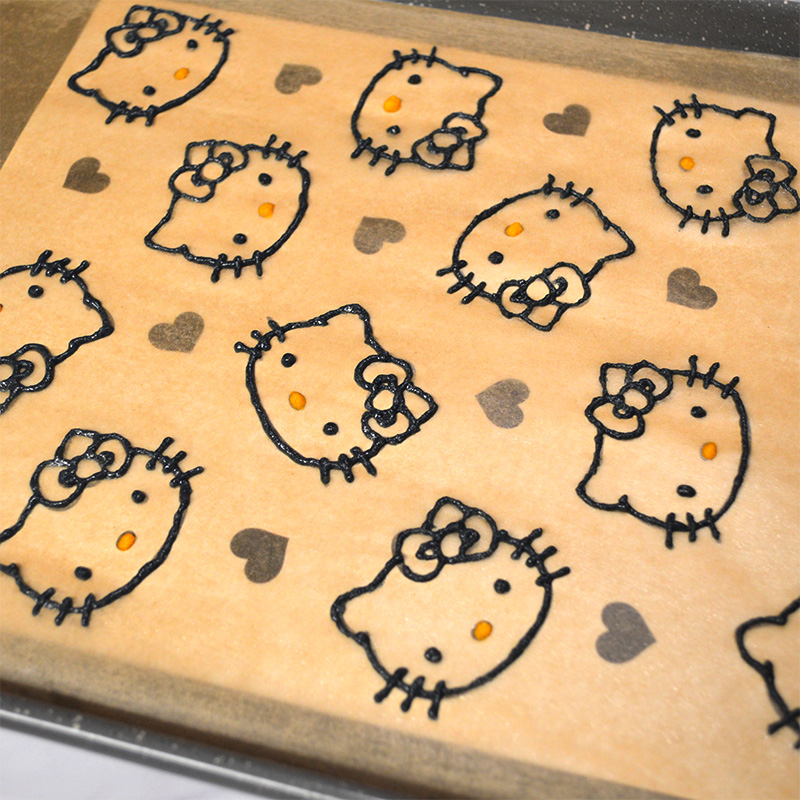
7. Pipe red paste to fill in Hello Kitty’s bows and hearts.
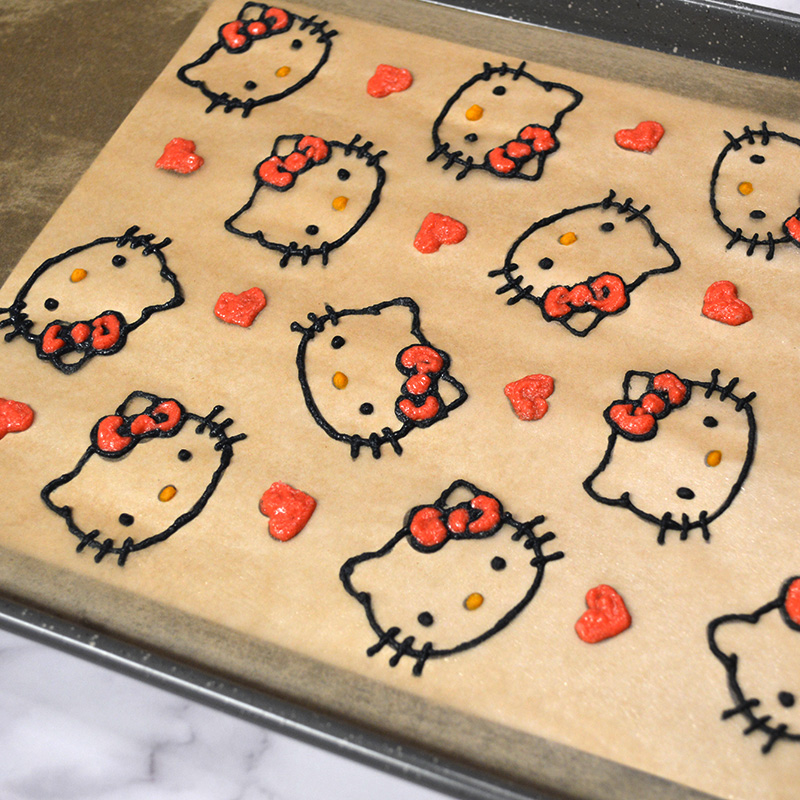
8. Finish by piping plain paste to cover Hello Kitty’s entire faces. Place pan in the freezer to allow the design to set while you prepare the rest of the batter.
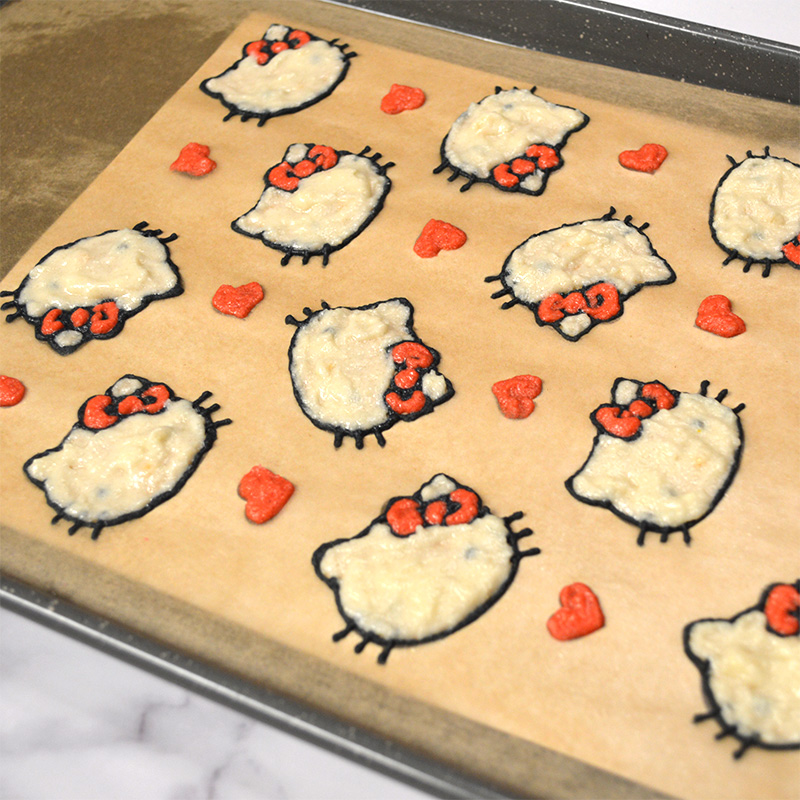
For cake:
- Preheat oven to 350 degrees F
- Place egg yolks in a mixing bowl. Add 1/4 cup sugar and whisk until sugar is dissolved and yolks are lightened in color. Drizzle in vegetable oil, whisking constantly until incorporated. Whisk in milk, vanilla extract, and salt. Add some pink and a tiny bit of red food coloring.
- Sprinkle sifted cake flour over the batter and fold until incorporated.
- In a clean mixing bowl or the bowl of a stand mixer fitted with the whisk attachment, beat egg whites until frothy. Add the remaining 2 tablespoons of sugar and beat on high speed until whites hold medium-stiff peaks.
- Fold a third of egg whites into batter to lighten it, then add the remaining egg whites and fold until just incorporated.
POINT: Do not overmix the batter once egg white is added. Overmixing will cause cake to turn out flat.
6. Pour batter over top of the frozen design, spreading the batter into an even layer using a large offset spatula. Bang the pan a few times on the countertop to remove any air bubbles and level out the top.
7. Bake for about 10 minutes or until the top is springy and the edges are just barely starting to brown.
8. Remove from oven. Carefully invert warm cake onto a piece of parchment backed by a solid surface like a large cutting board. Peel off parchment paper backing, revealing the design.
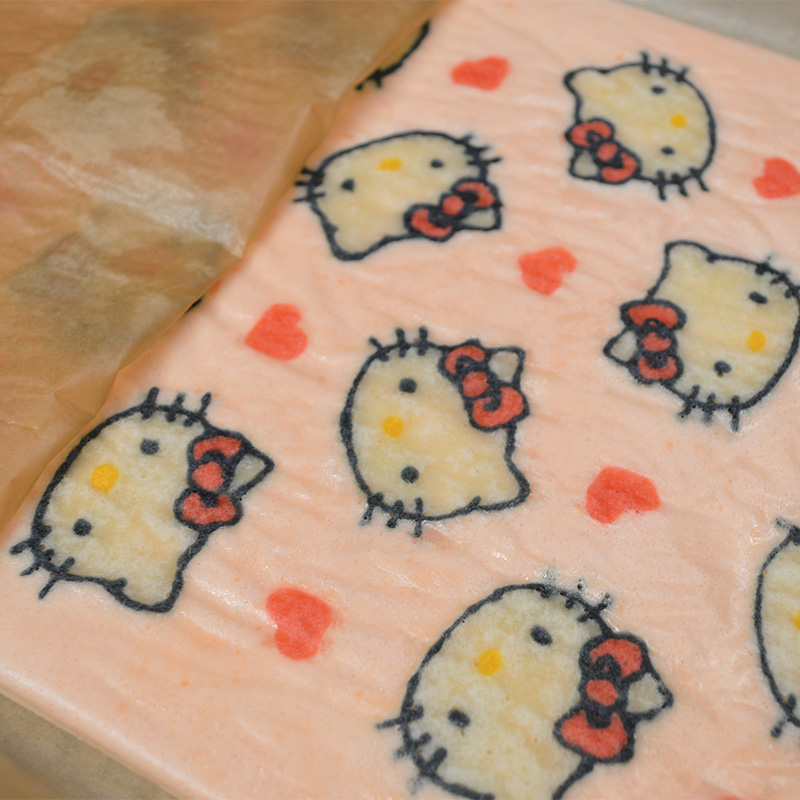
9. Liberally dust a clean towel with powdered sugar and lay it on top of the cake. Flip cake over so the design is facing down.
10. Starting with the side of the cake without the design, carefully roll up the warm cake in the towel. Doing this while the cake is still warm will mold the cake into a rolled shape and makes it easier to roll it back up later with the filling.
11. Let rolled cake cool for about 1 hour or until completely cool to the touch.
For Filling:
- Place your mixing bowl in the freezer or fridge 5-10 minutes before starting.
- In the chilled bowl, beat the cream cheese on medium-high speed for 2-3 minutes until cream cheese is smooth and free of lumps. Scrape down the sides of the bowl occasionally.
- Add the powdered sugar and vanilla extract and mix well.
- Slowly drizzle in the heavy whipping cream and continue beating until the cream cheese resembles a liquid mixture.
- Continue to add the remaining heavy whipping cream and beat on medium-high speed until stiff peaks form.
- Fold in chopped strawberries into the whipped cream mixture.
For assembly:
- Carefully unroll cake. You may need to hold it with your hand as it will try to roll back up. Spread filling into a thin even layer over the whole cake, leaving about 1/2 inch – 1 inch bare at the far end.
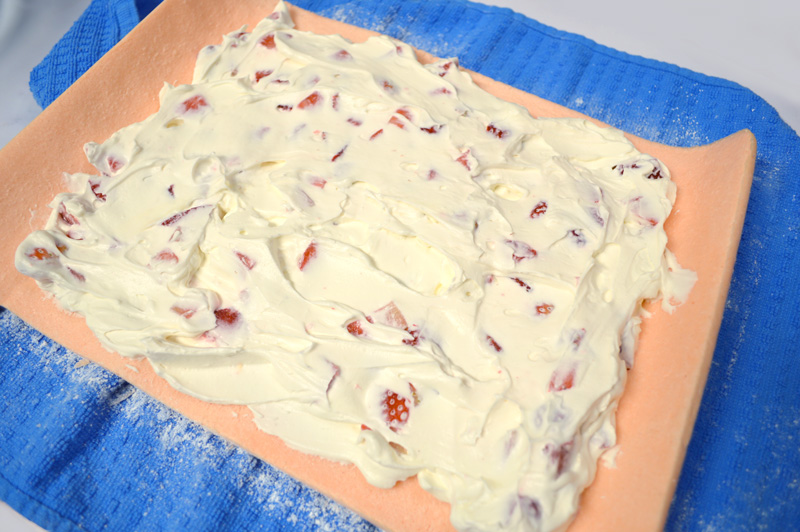
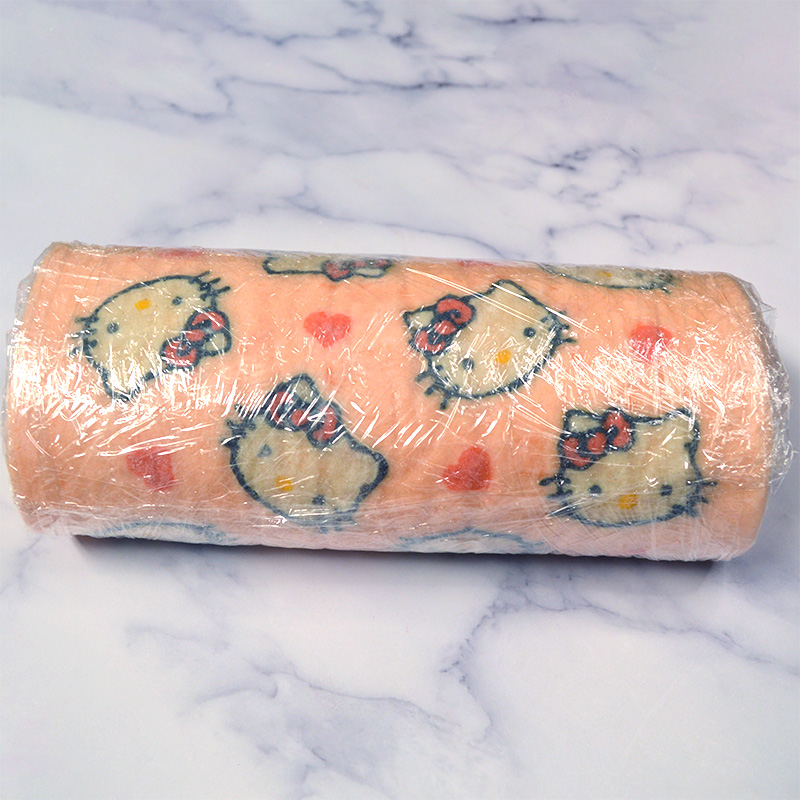
2. Gently roll up the cake, taking care not to use too much pressure so that the filling does not squeeze out the sides. Wrap tightly in plastic wrap and refrigerate for at least 2 hours or overnight.
When you are ready to eat
Cut into slices with a sharp knife (the design parts are harder than the cake itself. The slices will look best if you cut by pulling the knife gently towards you, letting the weight of the knife do the cutting; it may take a few strokes to get through the firmer design parts. Try not to saw back and forth or press down or the design will compress into the cake).
Storing Hello Kitty Cake Roll
If tightly wrapped and refrigerated, Hello Kitty cake roll will last up to 3 days.
If you like this Hello Kitty cake roll, you may also like:
Disclosure: SimplyAHomebody.com is reader-supported. When you buy through links on this site, I may earn a small affiliate commission at no additional cost to you. I only recommend products I would use myself. Learn more

Hello Kitty Cake Roll
Equipment
- Piping Bags
- Small Piping Tip (about 1 mm in Diameter)
- Parchment paper
- Jelly Roll Pan (15”x10”x1”)
- Hand mixer/stand mixer
- Bowls
- Spatulas
Ingredients
For Paste
- 2 Tablespoons 2 tablespoons (30g) unsalted butter 30g, softened (softer than room temp, but not melted)
- 2 ½ Tablespoons granulated sugar 30g
- ⅓ Cup cake flour 40g, sifted
- 1 large egg white
- black food coloring
- red food coloring
- yellow food coloring
For Cake
- 3 large eggs separated
- ¼ Cup granulated sugar for egg yolk
- 2 Tablespoons granulated sugar for egg white
- 1 Tablespoon vegetable oil
- 1½ Tablespoons whole milk 23g
- ½ Teaspoon vanilla extract
- ½ Teaspoon kosher salt
- ⅔ Cup cake flour 67g, sifted
- Pink food coloring
- Red food coloring
For Filling
- 1 Cup heavy whipping cream
- 4 Ounce cream cheese
- 1 Cup powdered sugar
- 1 Teaspoon vanilla extract
- 7-10 medium strawberries chopped
Instructions
For paste
- Lightly butter or grease the bottom and sides of a 15 by 10-inch jelly roll pan. Place any templates you like and put parchment paper over it, or you can line parchment paper with your design traced onto the backside with thick pencil lines.
- To make a paste, with a spatula or wooden spoon, mix softened butter and sugar together until you get a smooth paste.
- Add flour and mix until partially incorporated, then add egg white and mix until smooth. Paste should have a buttercream-like consistency.
- Leave about 1 teaspoon of paste in the large bowl and divide the rest of the paste into 3 small portions (I divided it almost evenly into 3 but slightly more for one of the cup). Leave the largest portion as is and add food colorings to the rest of 2 – one with red coloring, the other with black food coloring. Mix yellow food coloring to the teaspoon of paste in the large bowl.
- Transfer the black paste into a piping bag, fitted with a small round piping tip (1mm in diameter). Transfer the red and the plain paste into separate piping bags. For red and plain paste, piping tips are optional. Just snip the tips off about 3mm.
- Pipe design onto parchment paper. Start with the black to outline Hello Kitty’s faces then place the yellow paste on Hello Kitty’s nose with a toothpick.
- Pipe red paste to fill in Hello Kitty’s bows and hearts.
- Finish by piping plain paste to cover Hello Kitty’s entire faces. Place pan in the freezer to allow the design to set while you prepare the rest of the batter.
For cake
- Preheat oven to 350 degrees F
- Place egg yolks in a mixing bowl. Add 1/4 cup sugar and whisk until sugar is dissolved and yolks are lightened in color. Drizzle in vegetable oil, whisking constantly until incorporated. Whisk in milk, vanilla extract, and salt. Add some pink and a tiny bit of red food coloring.
- Sprinkle sifted cake flour over the batter and fold until incorporated.
- In a clean mixing bowl or the bowl of a stand mixer fitted with the whisk attachment, beat egg whites until frothy. Add the remaining 2 tablespoons of sugar and beat on high speed until whites hold medium-stiff peaks.
- Fold a third of egg whites into batter to lighten it, then add the remaining egg whites and fold until just incorporated.
- Pour batter over top of the frozen design, spreading the batter into an even layer using a large offset spatula. Bang the pan a few times on the countertop to remove any air bubbles and level out the top.
- Bake for about 10 minutes or until the top is springy and the edges are just barely starting to brown.
- Remove from oven. Carefully invert warm cake onto a piece of parchment backed by a solid surface like a large cutting board. Peel off parchment paper backing, revealing the design.
- Liberally dust a clean towel with powdered sugar and lay it on top of the cake. Flip cake over so the design is facing down.
- Starting with the side of the cake without the design, carefully roll up the warm cake in the towel. Doing this while the cake is still warm will mold the cake into a rolled shape and makes it easier to roll it back up later with the filling.
- Let rolled cake cool for about 1 hour or until completely cool to the touch.
For filling
- Place your mixing bowl in the freezer or fridge 5-10 minutes before starting.
- In the chilled bowl, beat the cream cheese on medium-high speed for 2-3 minutes until cream cheese is smooth and free of lumps. Scrape down the sides of the bowl occasionally.
- Add the powdered sugar and vanilla extract and mix well.
- Slowly drizzle in the heavy whipping cream and continue beating until the cream cheese resembles a liquid mixture.
- Continue to add the remaining heavy whipping cream and beat on medium-high speed until stiff peaks form.
- Fold in chopped strawberries into the whipped cream mixture.
For assembly
- Carefully unroll cake. You may need to hold it with your hand as it will try to roll back up. Spread filling into a thin even layer over the whole cake, leaving about 1/2 inch – 1 inch bare at the far end.
- Gently roll up the cake, taking care not to use too much pressure so that the filling does not squeeze out the sides. Wrap tightly in plastic wrap and refrigerate for at least 2 hours or overnight.
